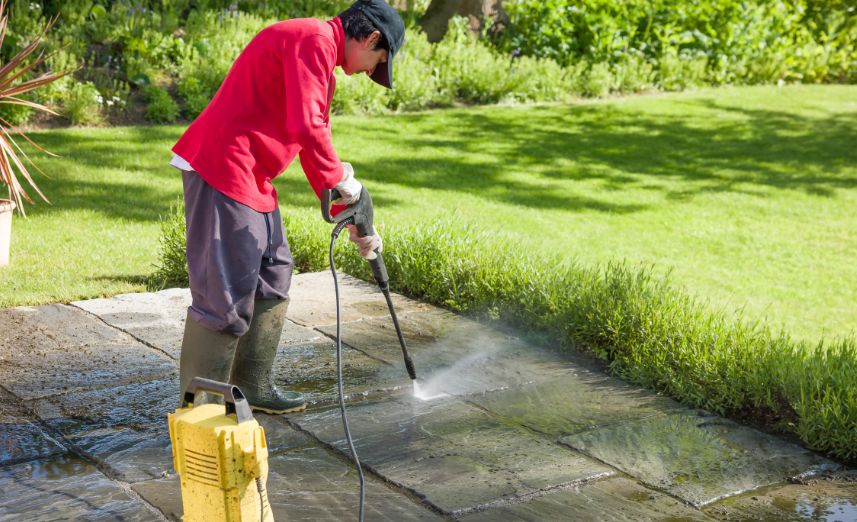
Why Professional Jet Washing is an Essential Part of Garden Maintenance
A professional clean goes far beyond a quick spray-down. It’s an investment in your property's appearance, safety, and longevity. A skilled tradesperson with the right equipment can achieve results that are simply not possible with DIY methods, revitalising your entire outdoor space.
Enhance Your Home's Kerb Appeal
Your patio is an extension of your living space, especially during the warmer months. A clean, bright patio provides the perfect backdrop for summer barbecues, family gatherings, or simply relaxing with a cup of tea. Professional jet washing instantly lifts the appearance of your garden, removing years of accumulated grime to reveal the original colour and texture of the stone. It’s one of the most cost-effective ways to improve your home's kerb appeal, making your entire property look smarter and better maintained.
Safety First: Removing Slippery Algae and Moss
In our damp climate, patios and pathways can quickly develop a coating of algae, lichen, and moss. When wet, these surfaces become incredibly slippery and pose a significant risk of falls, particularly for children and the elderly. While a brush or a light wash might temporarily clear the surface, only a high-pressure jet wash can penetrate the porous surface of the stone and paving to completely eradicate this organic growth, making your garden a much safer place for everyone.
Protect Your Investment: Preventing Long-Term Damage
Letting dirt and organic matter fester on your patio is not just an aesthetic issue. Moss and weeds that take root in the joints between slabs or blocks can cause significant damage over time. Their roots can dislodge the paving, crack the mortar (pointing), and compromise the structural integrity of the entire area. Furthermore, the acidic nature of some organic growth and bird droppings can permanently stain and etch delicate natural stone. Regular professional cleaning is a form of preventative maintenance, protecting your investment and saving you from more costly repairs down the line.
The Difference Between DIY and Professional Results
It can be tempting to hire a pressure washer from a local tool shop or buy a domestic model. However, there is a vast difference in the equipment and expertise offered by a professional. A tradesperson will use a commercial-grade machine that delivers significantly more power and water flow, combined with specialist attachments like a flat surface cleaner. This ensures a deep, even clean without the "zebra stripes" often left by DIY jetting.
Using a pressure washer incorrectly can cause irreparable damage. Too much pressure can etch the surface of softer stone, blast out the pointing between slabs, or strip the protective top layer from concrete. Professionals understand the correct pressure and techniques required for different materials, from robust concrete to delicate Indian sandstone. They also manage the entire process, protecting surrounding plants and surfaces and ensuring all debris and dirty water is properly washed away, leaving you with a pristine finish and no messy clean-up.
Understanding the Patio Jet Washing Process
A reputable professional follows a structured process to ensure a safe, effective, and high-quality result. Knowing what to expect helps you understand the value you’re receiving. Here is a typical step-by-step guide to a professional patio clean.
- Step 1: Initial Assessment and Quotation
The tradesperson will first visit your property or ask for detailed photos to assess the job. They will measure the area, identify the type of paving material (e.g., block paving, natural stone, concrete), and evaluate the level of soiling, moss, and weed growth. This allows them to provide you with an accurate, fixed-price quotation.
- Step 2: Preparing the Area
On the day of the job, the first task is to prepare the area. This involves moving all garden furniture, plant pots, and any other obstacles from the patio. They will also take care to protect nearby windows, doors, and delicate plants from spray and debris.
- Step 3: Pre-Treatment (If Necessary)
For heavily soiled patios or those with stubborn black lichen spots, a professional will often apply a pre-treatment. This is typically a biodegradable chemical solution that helps to break down algae, moss, and ingrained dirt, allowing the jet wash to work more effectively and at a lower, safer pressure.
- Step 4: The Jet Washing
Using their powerful equipment, the specialist will thoroughly clean the entire patio. For most surfaces, they will use a rotary or flat surface cleaner attachment. This tool contains the high-pressure jets within a housing, which provides a consistent, streak-free finish and significantly reduces overspray and mess. For edges, corners, and steps, they will use a lance with a fan nozzle.
- Step 5: Rinsing and Detail Cleaning
Once the main cleaning is complete, the entire area is thoroughly rinsed down to wash away all the dislodged dirt and cleaning residue. A professional service includes rinsing any splashback from adjacent walls, fences, and windows. They will also ensure that any drains or soakaways are clear of debris.
- Step 6: Re-Sanding (for Block Paving)
This step is absolutely critical for block-paved patios and driveways and is a key differentiator from a DIY job. The jet washing process removes the old, dirty sand from the joints. This sand must be replaced to ensure the blocks remain interlocked and stable. The professional will wait for the patio to dry sufficiently before sweeping fresh, kiln-dried sand into all the joints.
- Step 7: Post-Treatment and Sealing (Optional)
For the best long-term results, you may opt for additional services. A biocide treatment can be applied after cleaning to inhibit the regrowth of algae and moss. For ultimate protection, a high-quality sealant can be applied. Sealing makes the surface less porous, protecting it from stains and organic growth and making future cleaning much easier.

